Author: Sven Nierlein Description: Agent configuration for SNClient+ agents in Naemon. Download: This plugin is builtin and shipped with Thruk
Thruk is easily extenable with plugins and there are some plugins already included. Plugins itself reside in the plugins/plugins-available directory. Activate a plugin by creating a symlink in the plugins/plugin-enabled directory. If you use the packaged Thruk version, the plugins folder is directly in your Thruk folder. If you are using OMD, the plugins folder is in $OMD_ROOT/etc/thruk/plugins. Make sure you restart Thruk / Apache after enabling / disabling plugins.
| With Thruk 2.0 a few minor changes are required for plugins. If you have own custom plugins, the Migration Guide will help you getting them to work with Thruk 2.0. |
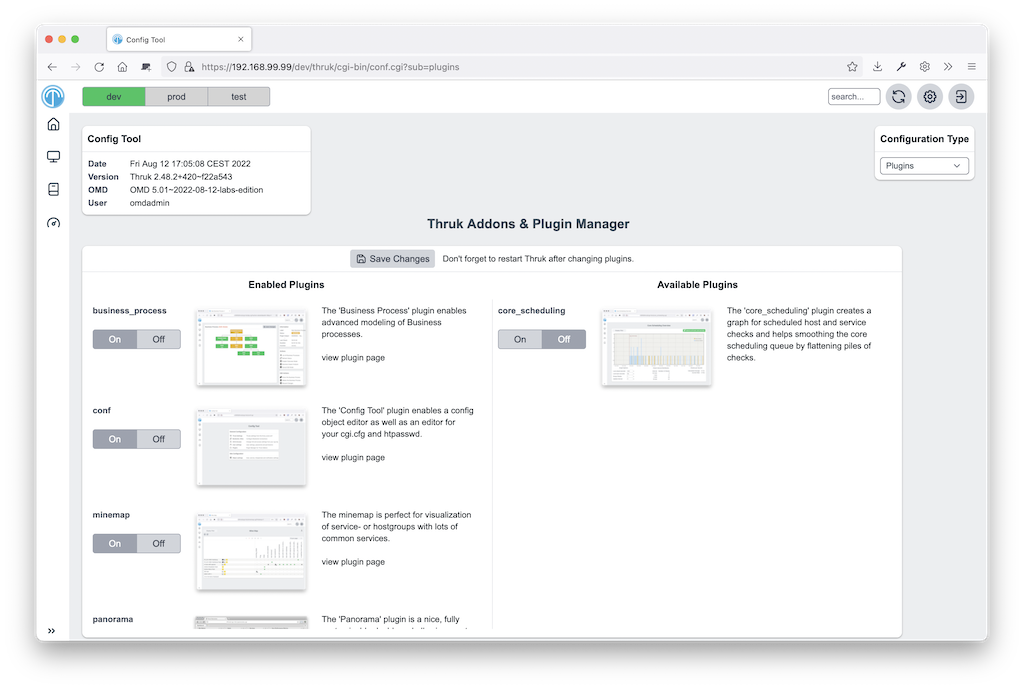
Later versions of Thruk have a plugins manager included in the config tool and you can manage your plugins there.
Example of a plugins folder with some plugins enabled.
 plugins
 ├── plugins-available
 │   ├── conf
 │   ├── minemap
 │   ├── reports2
 │   └── node-control
 └── plugins-enabled
     ├── conf             -> ../plugins-available/conf
     ├── minemap          -> ../plugins-available/minemap
     ├── reportss         -> ../plugins-available/reports2
     └── node-control     -> ../plugins-available/node-control
Builtin Core Plugins
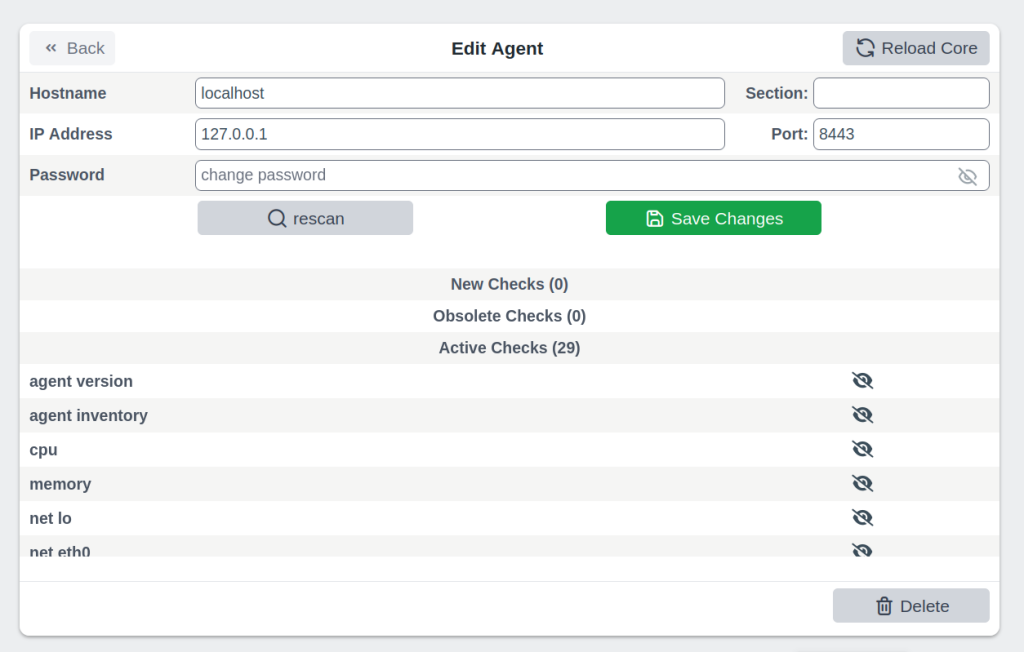
Agents
The agent plugin creates and manages the naemon configuration for SNClient agents.
A detailed documention is available on the agents plugin page.
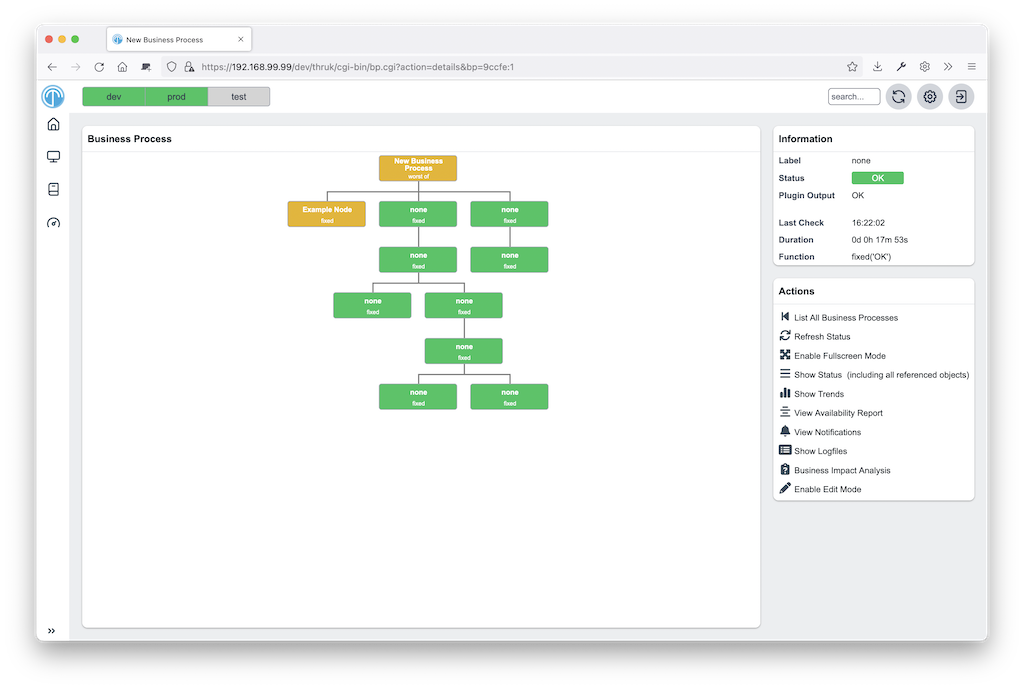
Business Process
 Author:      Sven Nierlein
 Description: Calculates Business Processes
 Download:    This plugin is builtin and shipped with Thruk
The Business Process plugin creates, edits and calculates business processes which then can be used as hosts and services for further notifications and displaying purposes.
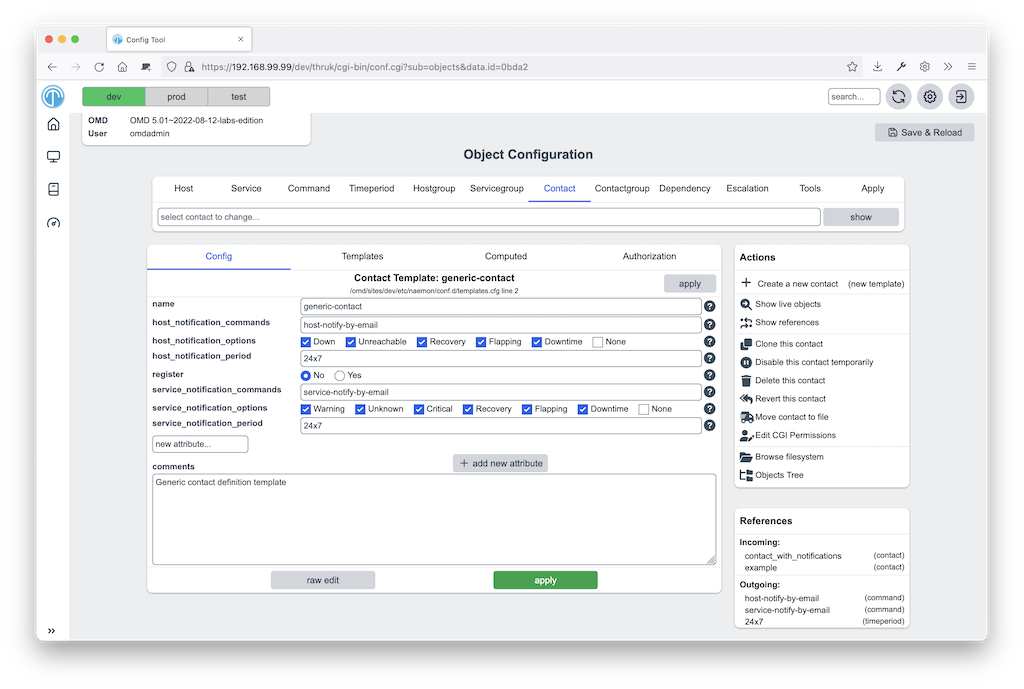
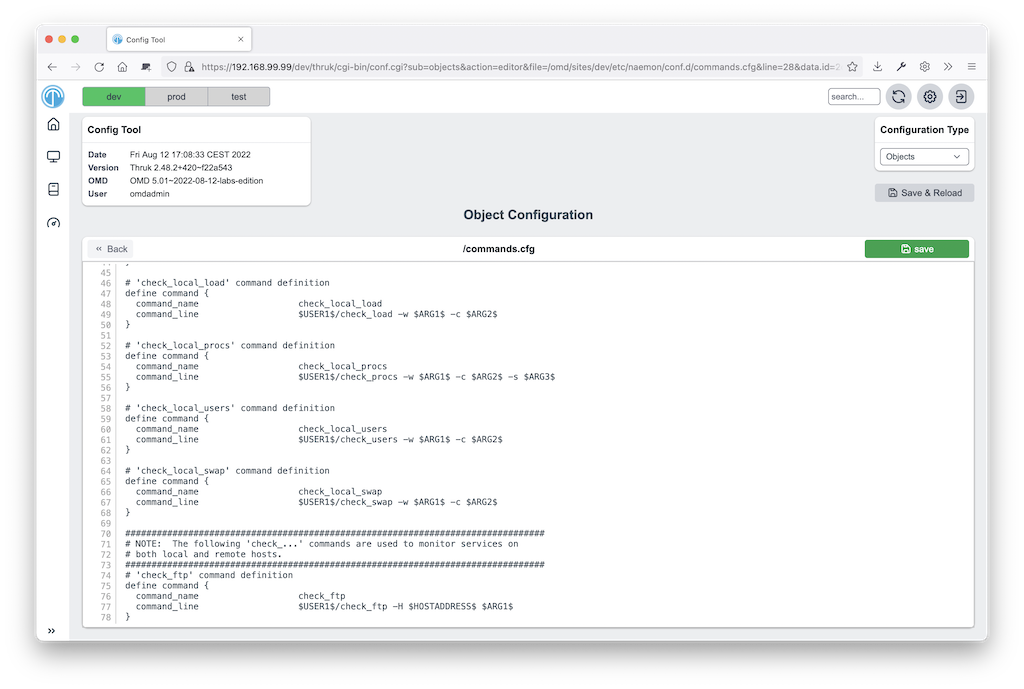
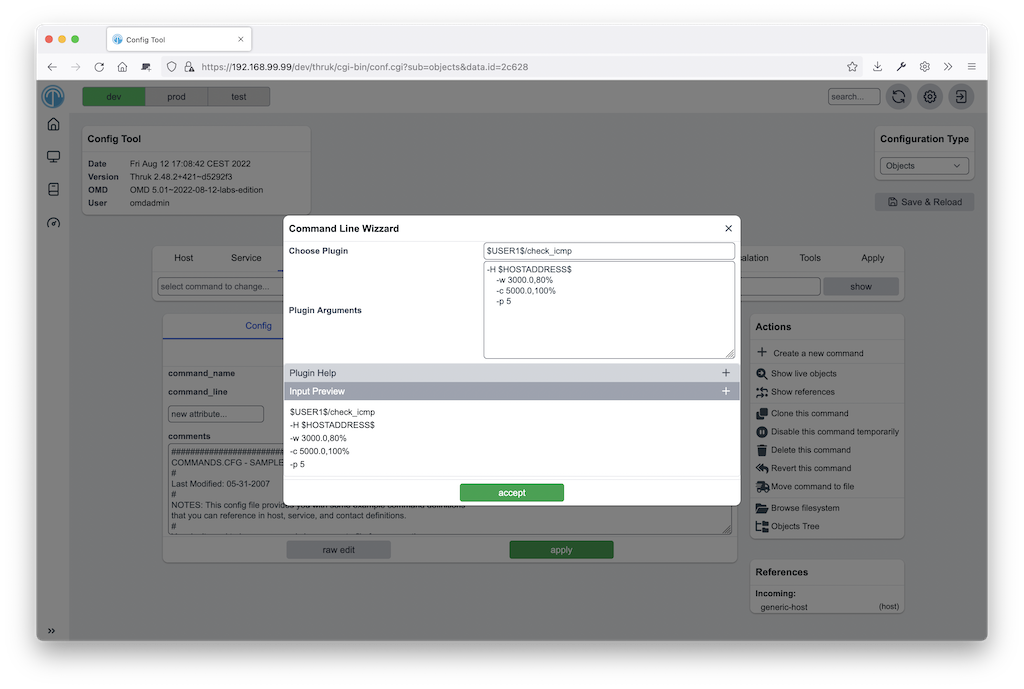
Config Tool
 Author:      Sven Nierlein
 Description: Manage config files directly in Thruk
 Download:    This plugin is builtin and shipped with Thruk
The Config Tool plugin allows you to make config changes directly in Thruk. Currently it supports editing the cgi.cfg and the thruk.cfg. The changes will be active immediately, so there is no need to restart Thruk.
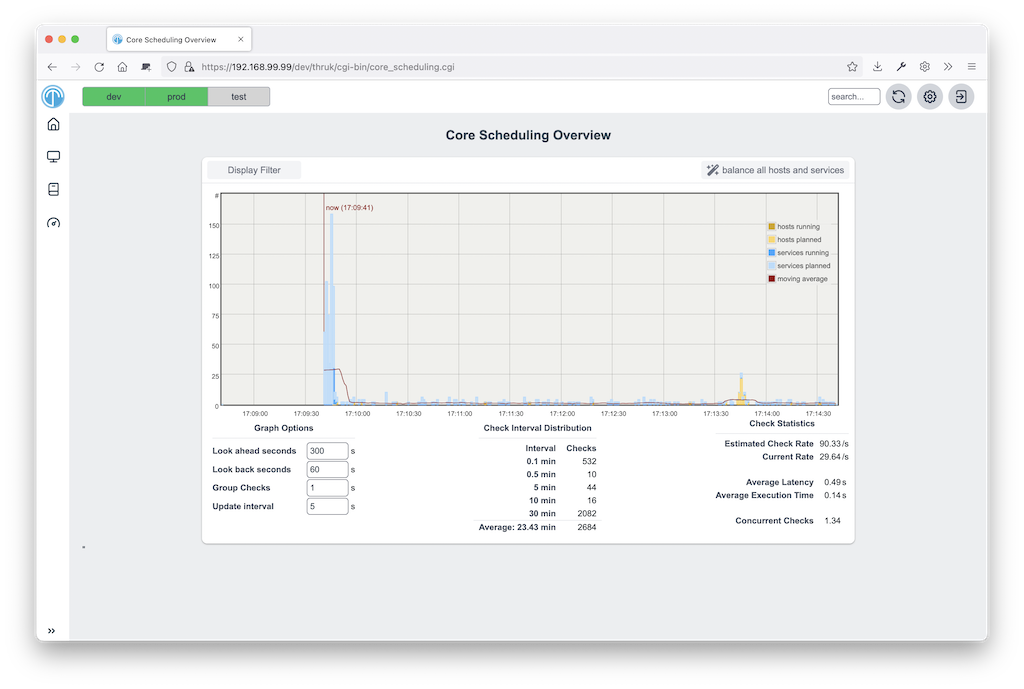
Core Scheduling Graph
 Author:      Sven Nierlein
 Description: Visualize Core Scheduling
 Download:    This plugin is builtin and shipped with Thruk
The Core scheduling plugin allows you to visualize the active host and service checks on a timeline. This plugin also provides a cli command to balance out all (or only a few) checks evenly to reduce load piles.
This addon is shipped with Thruk since version 2.06 but not enabled by default.
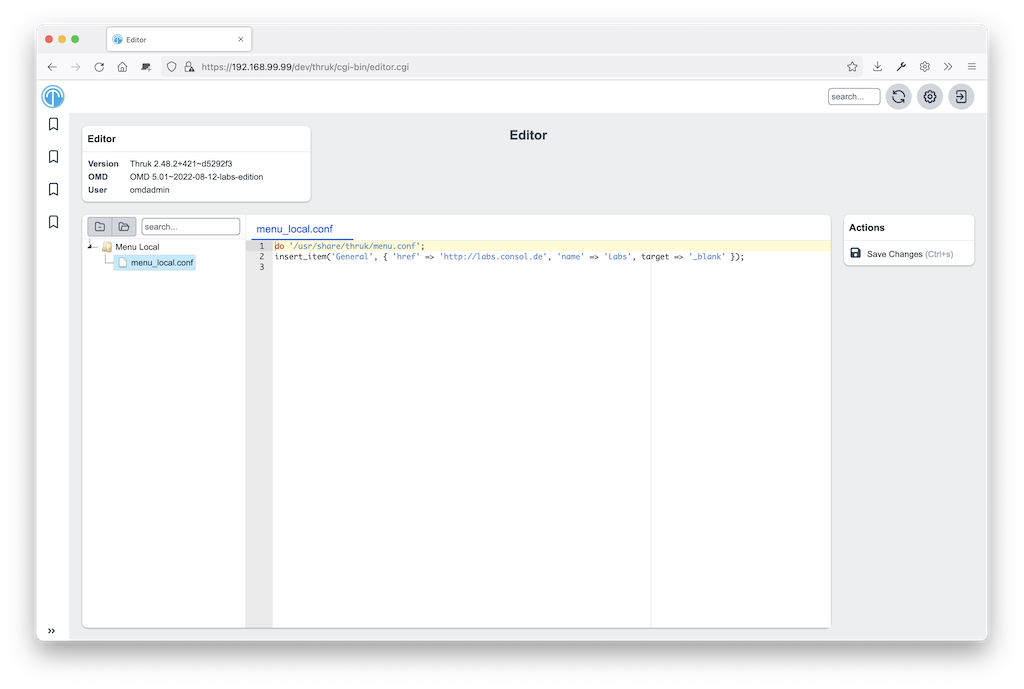
Editor
 Author:      Sven Nierlein
 Description: Generic Text Editor
 Download:    This plugin is builtin and shipped with Thruk
The editor plugin allows you to edit all types of text files. And provides a way to define further custom actions for each file type, like syntax check etc…
A detailed documention is available on the editor plugin page.
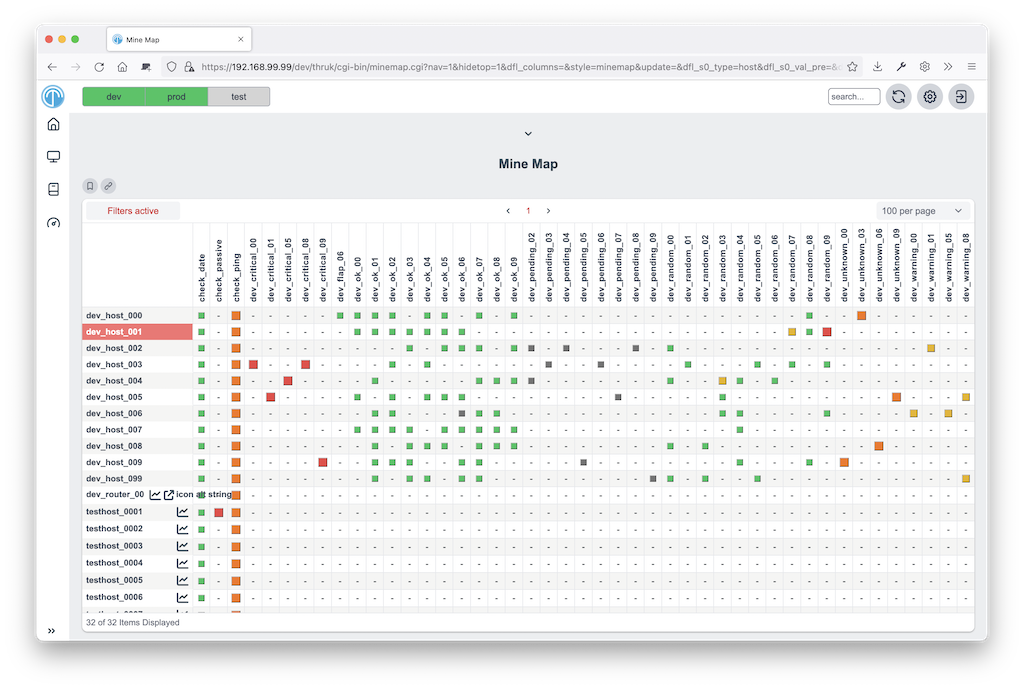
Mine Map
 Author:      Sven Nierlein
 Description: The Mine Map gives a quick overview over similar
              services
 Download:    This plugin is builtin and shipped with Thruk
The Mine Map creates a matrix from all combinations of selected hosts and services and display a grid of status information. Normal filters can be used to reduce the amount of services or show just a single host- or servicegroup. The Mine Map is particular useful if you have a set of hosts with lots of common services.
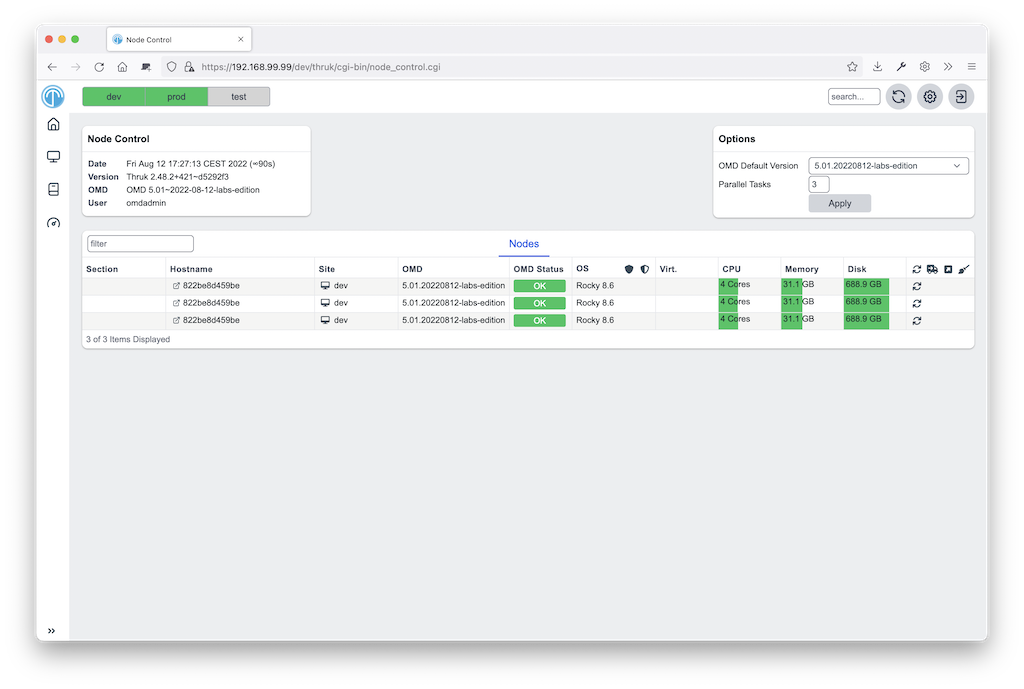
Node-Control
 Author:      Sven Nierlein
 Description: Install OMD/OS Updates
 Download:    This plugin is builtin and shipped with Thruk
The node control plugin allows you to control omd nodes and install/update new omd versions. The plugin also supports installing os updates and shows a brief summary of the main node ressouces.
A detailed documention is available on the node-control plugin page.

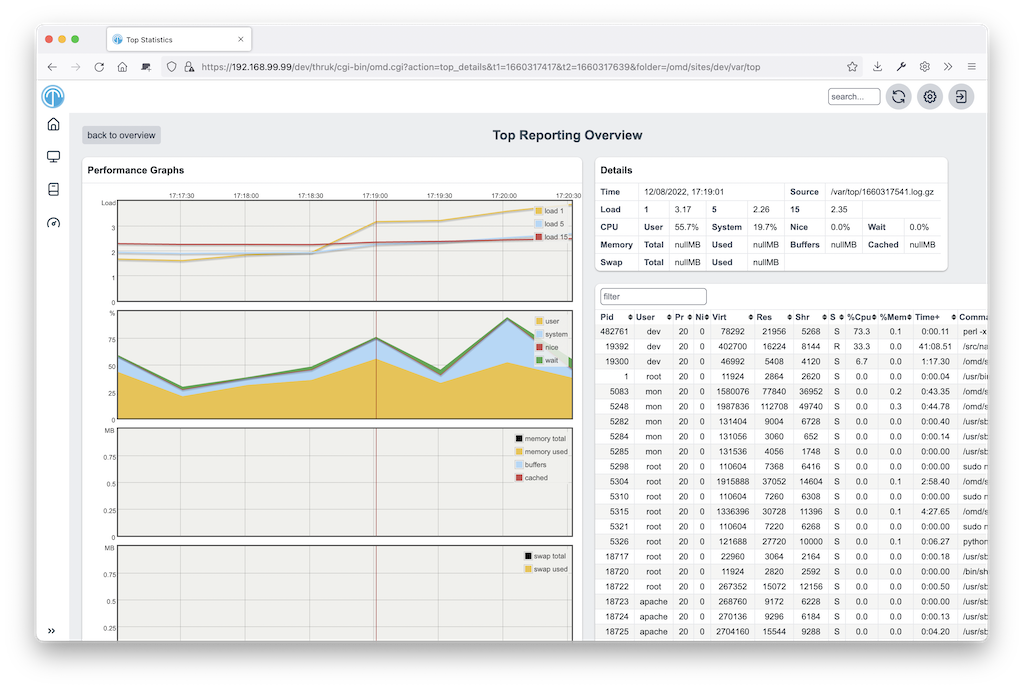
OMD
 Author:      Sven Nierlein
 Description: OMD Specific Addons
 Download:    This plugin is builtin and shipped with Thruk
The omd plugin saves top and gearman_top data every minute
for the last week for debuging purposes. It then draws nice
usage graphs with a drill down functionality. For every
point in the last week the complete top data can be fetched,
sorted and filtered.
A detailed documention is available on the omd plugin page.
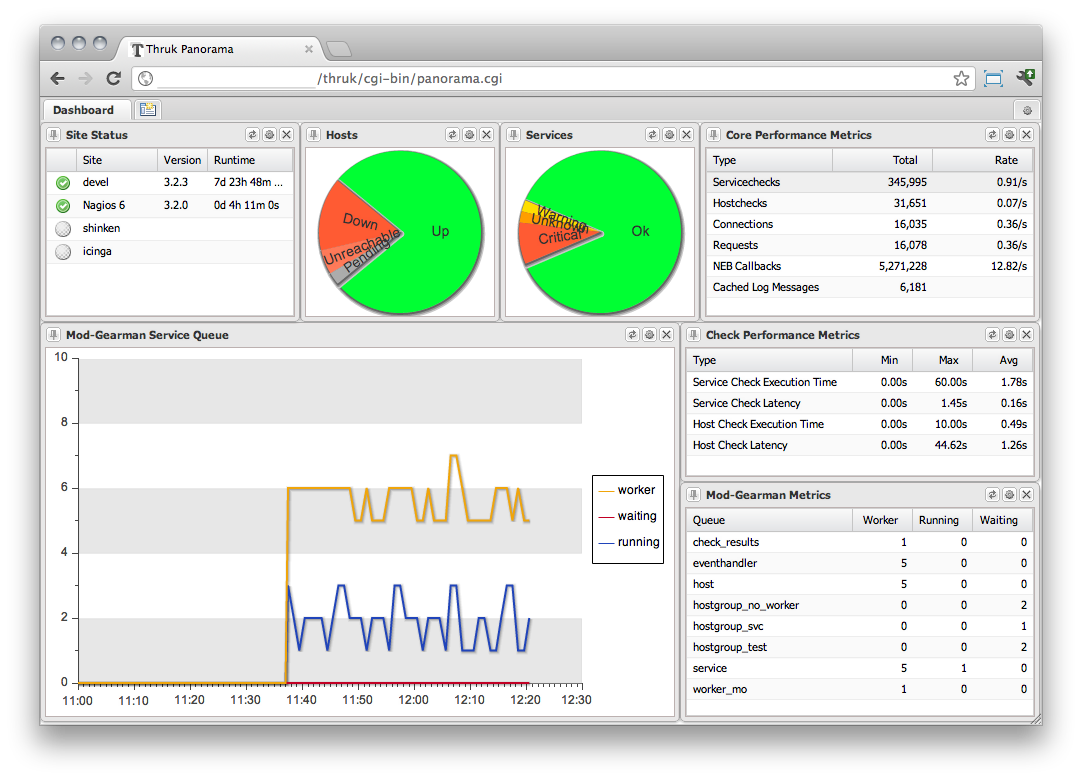
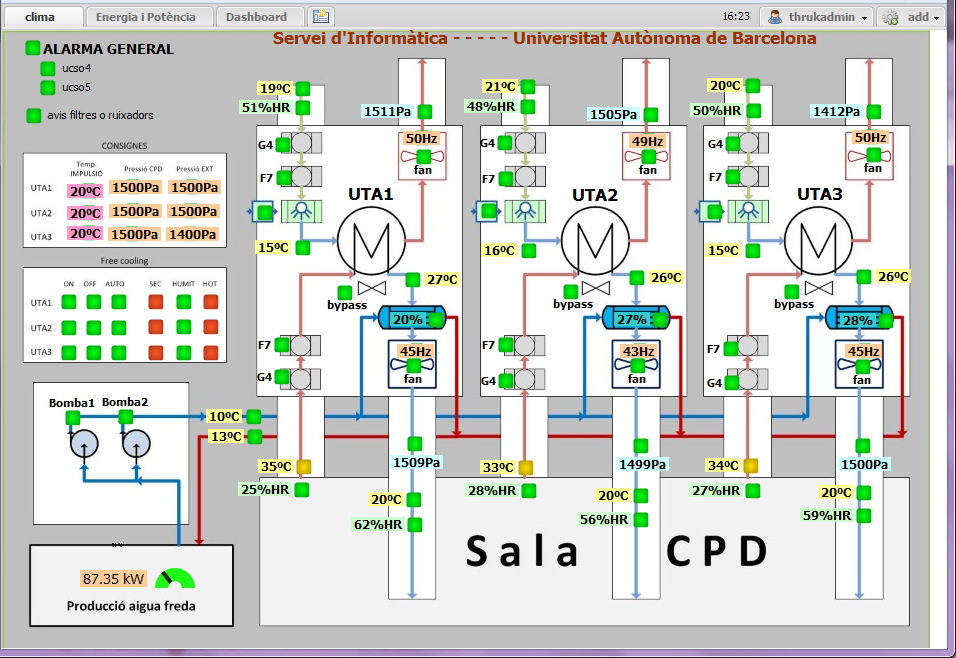
Panorama
 Author:      Sven Nierlein
 Description: Panorama View Dashboard
 Download:    This plugin is builtin and shipped with Thruk
The Panorama plugin is a full customizable dashboard allowing you to build your own panorama views. It supports multiple panels and sticky windows. Read more
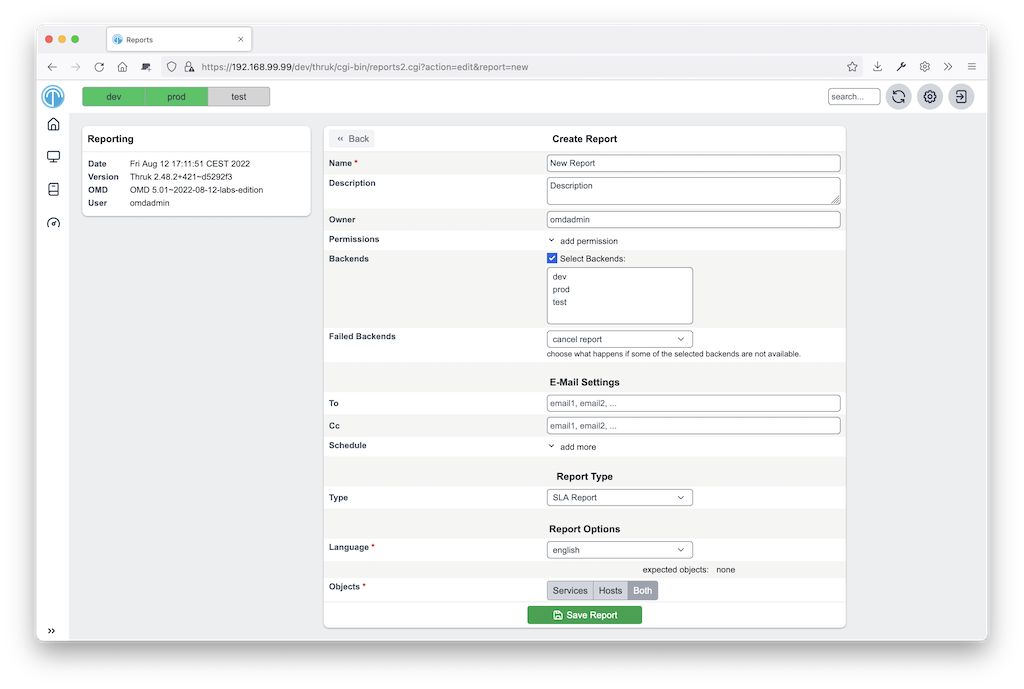
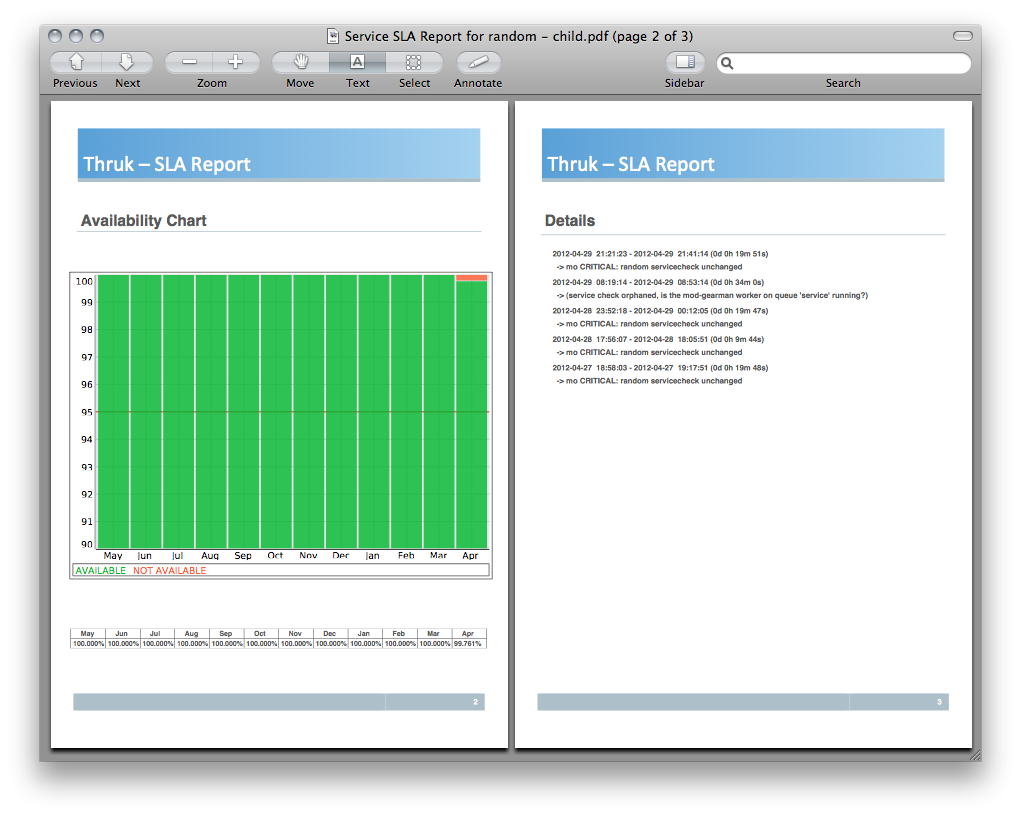
Reports
 Author:      Sven Nierlein
 Description: SLA Reports
 Download:    This plugin is builtin and shipped with Thruk
SLA reports are a good way to send monthly reports about service level contracts. Reports can be either downloaded or send by mail using the thruk command line tool. Read more
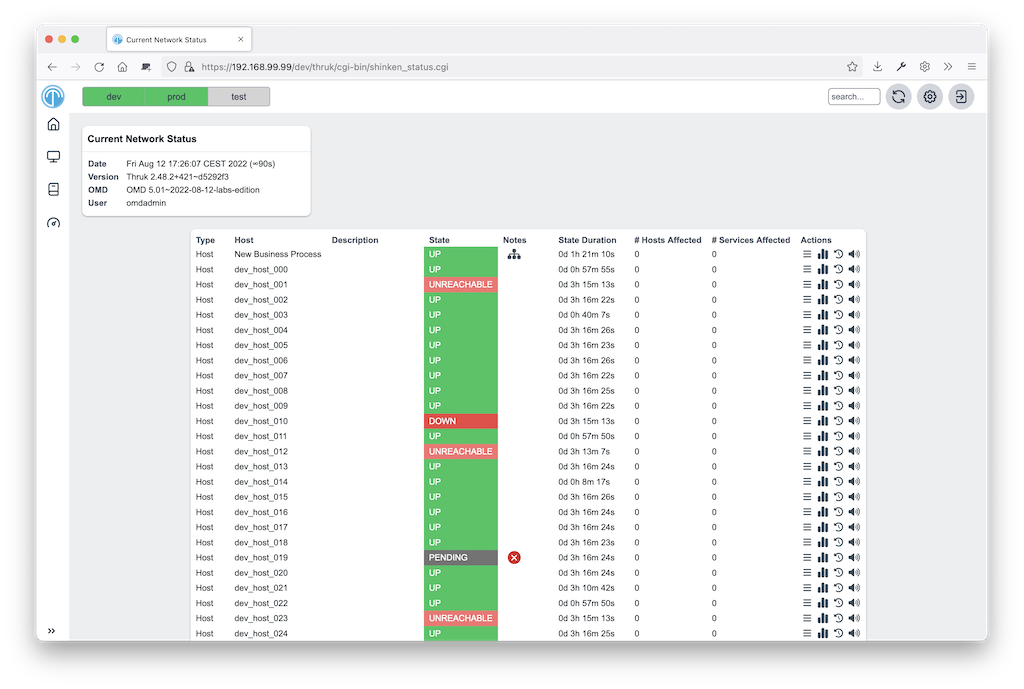
Shinken Features
 Author:      Jean Gabes, Sven Nierlein
 Description: Contains Shinken specific addons like business view and
              impacts view.
 Download:    This plugin is builtin and shipped with Thruk
This shinken contains all Shinken specific addons to Thruk. Most Shinken specific features can only be used if there are only Shinken backends active. There is a view for business processes, which can be defined in Shinken only and there is a problems view, which show all root problems (problems not caused by another problem) order by priority.
Additional Plugins
Woshsh
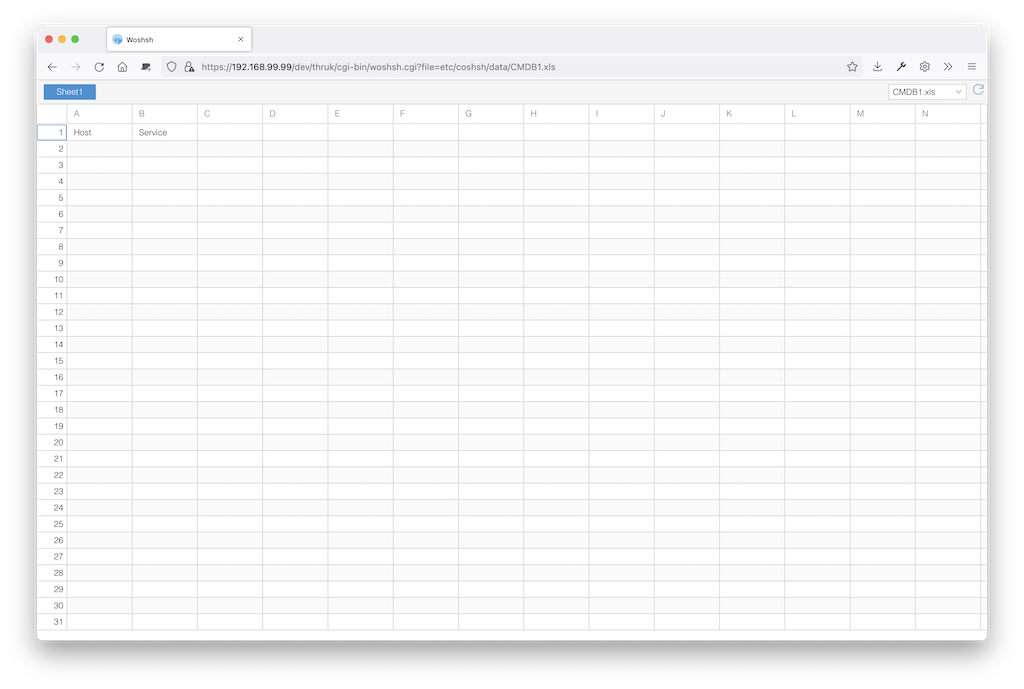
 Author:      Sven Nierlein
 Description: Generic Text Editor
 Download:    https://github.com/sni/thruk-plugin-woshsh
The woshsh plugin allows you to edit xls files, mainly to provide a datasource for the coshsh configuration generator.
Pansnaps
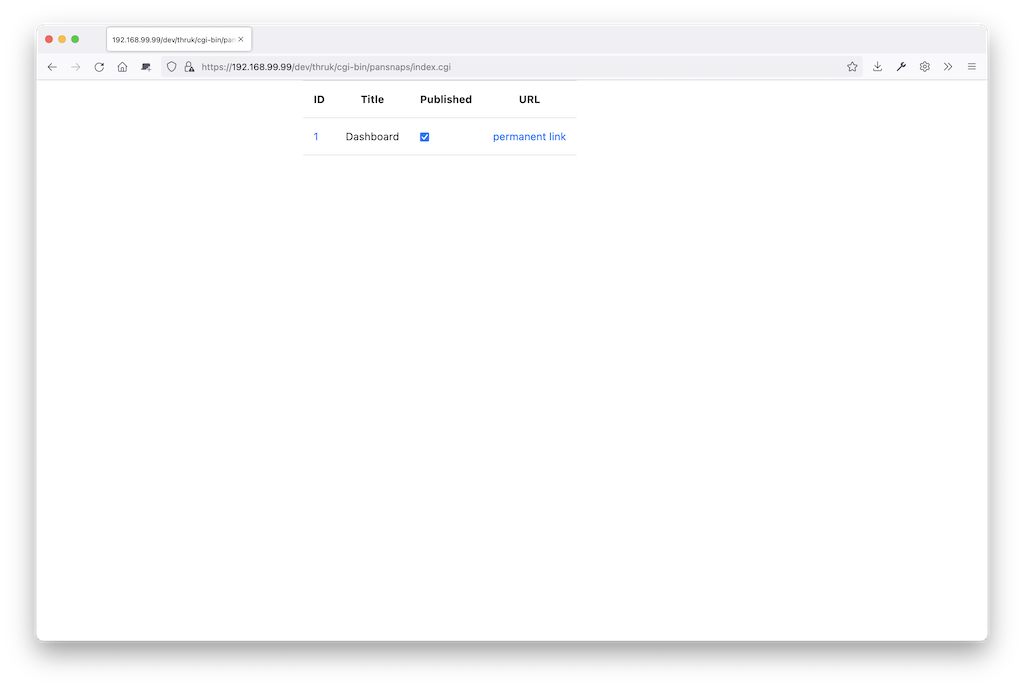
 Author:      Danijel Tasov
 Description: Generic Text Editor
 Download:    https://github.com/ConSol/thruk-plugin-pansnaps
The pansnaps plugin allows you to export panorama dashboards as static images.
Installation
Installation of a plugin is easy:
Installation
-
Unpack the plugin in plugins-available directory.
-
Create a symlink in plugins-enabled which points to the plugin.
-
Restart Thruk (if you use mod_fastcgi) or your webserver (if you use mod_fcgid)
Deactivate
-
Remove the symlink from plugins-enabled
-
Restart Thruk (if you use mod_fastcgi) or your webserver (if you use mod_fcgid)
Uninstall
-
Remove plugin from plugins-available
Since version 1.36 you may use the Plugin Manager from the config tool plugin to select your plugins.
Hello World Plugin
 Author:      Mikael Nordin
 Description: Hello World Plugin
 Download:    https://github.com/mickenordin/thruk_hello
The hello world plugin should get you started if you want to write your own plugin.
Writing your own plugins
The directory structure of a plugin is similar to a normal perl module. The following example has lib, static content, templates and tests. But you don’t need all of them.
| Let me know if you want to get your plugin listed here. |
  ├── lib
  │   └── Thruk
  │       └── Controller
  ├── root
  │   └── images
  ├── t
  └── templates
Structure
-
lib containts all Perl files
-
root contains all static content
-
t keep the tests here
-
templates contains all template files for dynamic pages
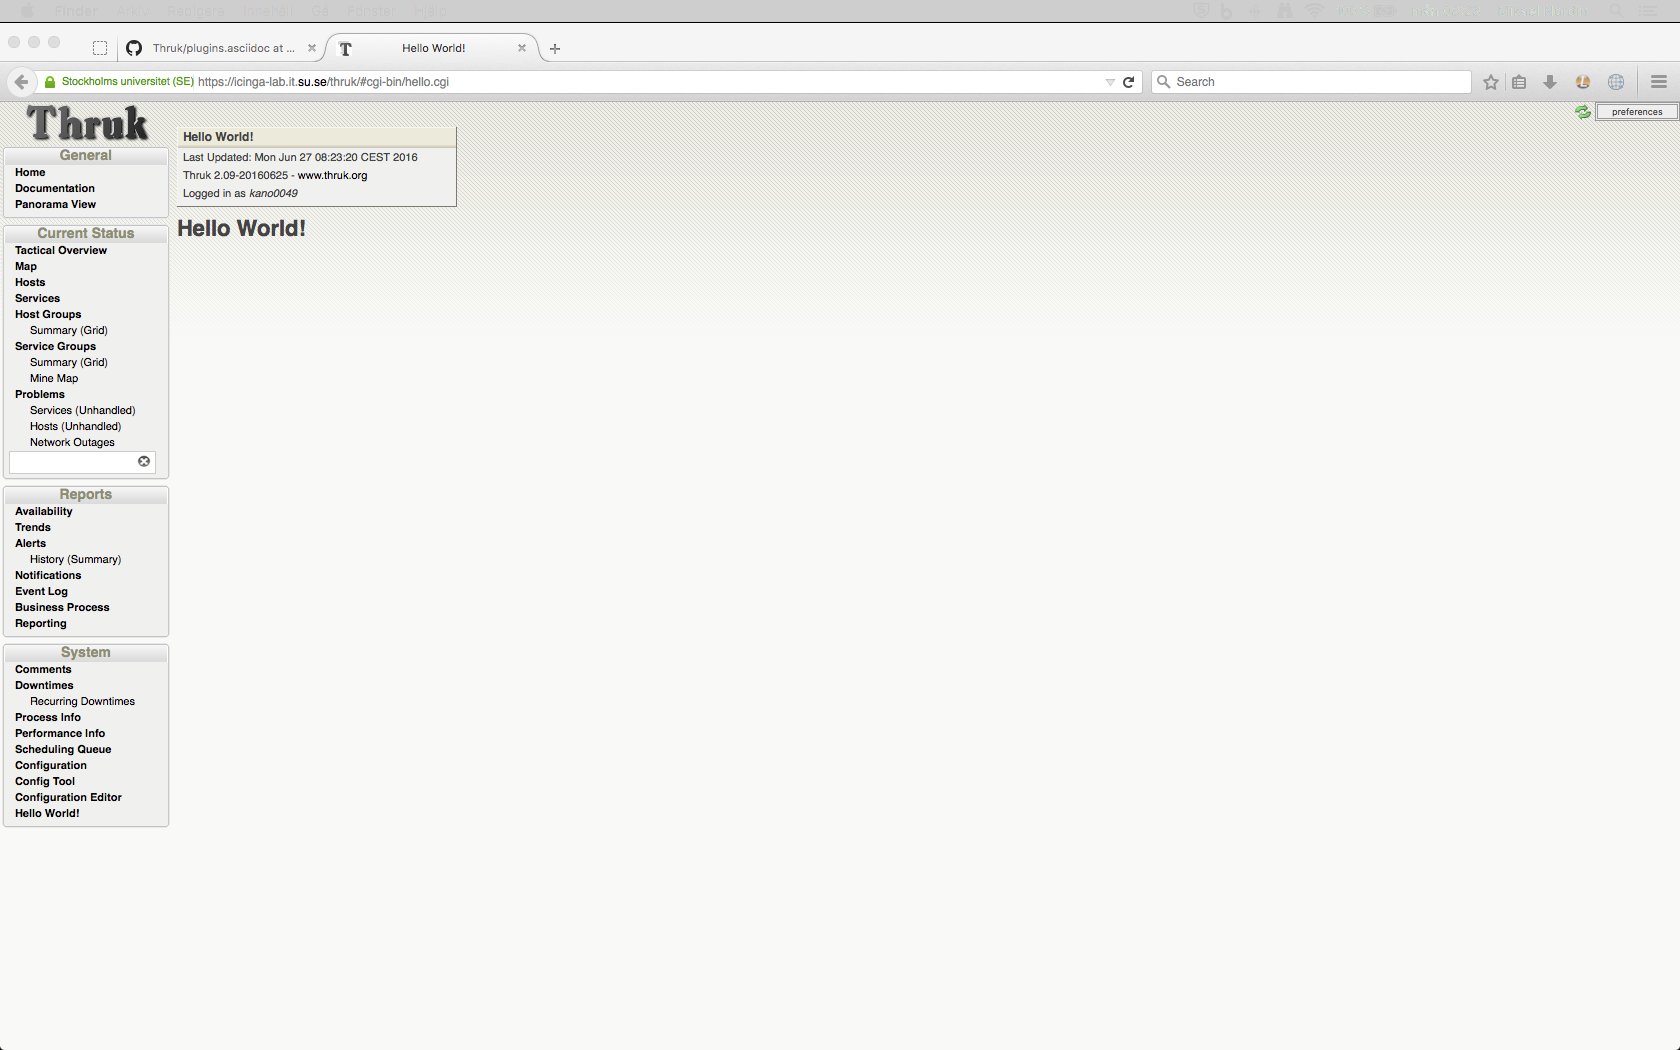
Hello World Plugin
In this example we will create a small Plugin that displays the words "Hello World!" on the plugin page hello.cgi.
First we create a minimal directory structure the plugin directory, in linux it might be done like this:
mkdir -p hello/{lib/Thruk/Controller,templates}
Next we need to create some files:
-
hello/description.txt
-
hello/preview.png
-
hello/routes
-
hello/lib/Thruk/Controller/hello.pm
-
hello/templates/hello.tt
hello/description.txt
This file contains some basic information about your plugin displayed on the plugin overview page. For example
The 'Hello World' plugin displays the words "Hello World!" on the
plugin page hello.cgi.

Url: hello.cgi
hello/preview.png
This is an image file that is also displayed on the plugin overview.
hello/routes
This file is a snippet part of a perl module and contains a menu item for the sidebar:
##########################################################

=head2 add_routes

page: /thruk/cgi-bin/hello.cgi

=cut

$routes->{'/thruk/cgi-bin/hello.cgi'} = 'Thruk::Controller::hello::index';

# add new menu item
Thruk::Utils::Menu::insert_item('System', {
                                'href'  => '/thruk/cgi-bin/hello.cgi',
                                'name'  => 'Hello World!',
});
hello/lib/Thruk/Controller/hello.pm
This file is a perl module and contains the actual perl code that is run. In this case we only set a variable called hello_var in our Thruk::Context that we will access from the template later:
package Thruk::Controller::hello;

use strict;
use warnings;

=head1 NAME

Thruk::Controller::hello - Hello World!

=head1 DESCRIPTION

Hello World!.

=head1 METHODS

=cut


=head2 index

=cut

sub index {
        my ( $c ) = @_;

        return unless Thruk::Action::AddDefaults::add_defaults($c, Thruk::Constants::ADD_CACHED_DEFAULTS);

        $c->stash->{title}           = 'Hello World!';
        $c->stash->{'subtitle'}              = 'Hello World!';
        $c->stash->{'infoBoxTitle'}          = 'Hello World!';
        $c->stash->{template} = 'hello.tt';
        $c->stash->{hello_var} = 'Hello World!'; # This is our magic variable
}

1;
hello/templates/hello.tt
This file is the template that builds our HTML for the hello.cgi page. It mostly consists of HTML with some variables accessed via the [% variable_name %] notation.
<!DOCTYPE html>
<html>
	<head>
		<title>[% title_prefix %][% title %]</title>
		[% PROCESS _favicon.tt %]
		<meta http-equiv="Content-Type" content="text/html; charset=utf-8" />
		<meta name="viewport" content="width=device-width, initial-scale=1, maximum-scale=1, user-scalable=no" />
	</head>
	<body>
		<h1>[% hello_var %]</h1> <!-- This is where we access our variable -->
	</body>
</html>
Now if you want a more stylish plugin you can add some Thruk-common css and make your template look like this:
<!DOCTYPE html>
<html>
	<head>
		<title>[% title_prefix %][% title %]</title>
		[% PROCESS _favicon.tt %]
		<meta http-equiv="Content-Type" content="text/html; charset=utf-8" />
		<meta name="viewport" content="width=device-width, initial-scale=1, maximum-scale=1, user-scalable=no" />
		[% PROCESS _common_css.tt  %]
		[% PROCESS _header.tt
			css=["plugins/conf/conf.css"]
			js=["plugins/conf/conf.js"]
		%]
	</head>
	<body>
		<h1>[% hello_var %]</h1> <!-- This is where we access our variable -->
	</body>
</html>
You can also add some info boxes and your plugin will look like all the rest:
<!DOCTYPE html>
<html>
	<head>
		<title>[% title_prefix %][% title %]</title>
		[% PROCESS _favicon.tt %]
		<meta http-equiv="Content-Type" content="text/html; charset=utf-8" />
		<meta name="viewport" content="width=device-width, initial-scale=1, maximum-scale=1, user-scalable=no" />
		[% PROCESS _common_css.tt %]
		[% PROCESS _header.tt
			css=["plugins/conf/conf.css"]
			js=["plugins/conf/conf.js"]
		%]
	</head>
	<body>
		[% PROCESS _message.tt %]
		[% PROCESS _overdiv.tt %]
		[% PROCESS _infobox.tt %]
		<h1>[% hello_var %]</h1> <!-- This is where we access our variable -->
	</body>
</html>
You can also protect your cgi page using the authorization settings from cgi.cfg.
Lets say you want to limit access to users with both the permissions authorized_for_configuration_information and authorized_for_system_commands then you can use the function $c→check_user_roles with the appropriate parameters to check permissions. You can modify your index function in hello/lib/Thruk/Controller/hello.pm to look like this to stop anyone from accessing your cgi without proper permissions:
sub index {
        my ( $c ) = @_;

        return unless Thruk::Action::AddDefaults::add_defaults($c, Thruk::Constants::ADD_CACHED_DEFAULTS);
        if( !$c->check_user_roles("authorized_for_configuration_information") || !$c->check_user_roles("authorized_for_system_commands")) {
                return $c->detach('/error/index/8');
        }

        $c->stash->{title}           = 'Hello World!';
        $c->stash->{'subtitle'}              = 'Hello World!';
        $c->stash->{'infoBoxTitle'}          = 'Hello World!';
        $c->stash->{template} = 'hello.tt';
        $c->stash->{hello_var} = 'Hello World!'; # This is our magic variable
}
That’s it! With these files in place you can restart your webserver and you will have a link to hello.cgi in your Thruk sidebar.
| Try to copy an existing plugin, change it to your needs or copy/paste ideas from it to your own. |